How to Naturally Dye Easter Eggs

As hand-dyers who love playing with colour, it's only natural that we would love dyeing eggs as well as yarn. I've been exploring using natural dyes for Easter eggs for several years and after much trial and error, I've put together some instructions and tips for you.
I'm sure I'll continue to experiment, but so far these are my favourite natural dyes to work with on eggs and the ones that I find give the most reliable results. I love that some of the dyestuffs give colours that you'd expect like turmeric (yellow) and some are totally unexpected like hibiscus (green/grey/black!). Enjoy and have fun doing your own experimentation!
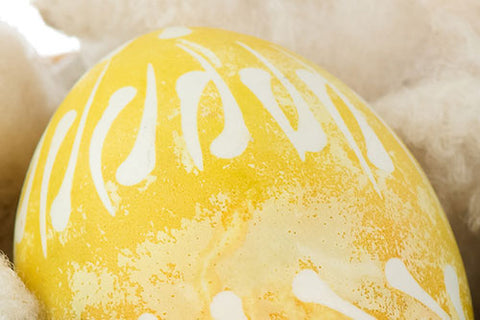
Note: The eggs shown in the photos here were decorated using a traditional Lithuanian batik technique which involves applying melted beeswax with a stylus to the eggs before they are dyed and then gently removing the wax after the eggs are dyed and dry, before applying the oil. For a simpler resist technique suitable for small children, rubber bands of various thicknesses can create interesting patterns when wrapped around the eggs before dying them.
Materials for Natural Dyeing
- hard-boiled eggs, cooled
- dishsoap
- yellow onion skins (golden yellow/orange)
- beets (pink/red)
- dried hibiscus flowers (green/grey/black)
- red cabbage (blue)
- turmeric (bright yellow)
- black beans (purplish blue)
- white vinegar
- oil
Equipment for Natural Dyeing
- measuring cups and spoons
- cutting board, knives, grater for preparing dyestuffs
- pots and spoons for cooking dyes
- mesh strainer
- cheesecloth for straining turmeric
- jars/containers - at least one per dye colour
- empty egg cartons for drying eggs
Tips
Dyes can be made up ahead of time and kept in the fridge until needed.
If using a wax resist, ideally both eggs and dyes will be at room temperature before dyeing the eggs.
You’ll need about ¾-1 cup of dye per egg at a time, but you can reuse the dye for multiple eggs.
It’s preferable to use eggs without a date stamp on them. Try asking at your local farmers’ market.
You can dye brown eggs although they are not as effective for the batik wax resist technique. In general you’ll get darker and more earthy colours that are less vibrant.
Health Canada recommends that hard-boiled eggs are not kept at room temperature for more than 2 hours and that they should be eaten within one week.

Natural Dye Preparations
Each of the following “recipes” will give about 1½-2 cups of dye after cooking and straining. Once you’ve strained out the dyestuffs, measure the remaining liquid and add 1 Tbsp of vinegar per cup of dye liquid.
Turmeric (pale yellow to bright yellow)
2 Tbsp powdered turmeric
2 cups of water
Bring to a simmer and simmer covered for 15 minutes. Cool, strain through cheesecloth, and add vinegar.

Beets (pink to red)
2 cups of grated beets
2 cups of water (enough to cover)
Bring to a simmer and simmer covered for 30 minutes. Cool, strain and add vinegar.

Red Cabbage (light blue to dark blue)
2 cup shredded cabbage
2 cups of water (enough to cover)
Bring to a simmer and simmer covered for 30 minutes. Cool, strain and add vinegar.
Left: overnight in dye; right: 30 minutes in dye

Yellow Onion Skins (golden yellow to orange)
2 cups of onion skins
2 cups of water (enough to cover)
Bring to a simmer and simmer covered for 30 minutes. Cool, strain and add vinegar.

Hibiscus (green/grey/black)
¼ cup dried hibiscus flowers
2 cups of water
Bring to a simmer and simmer covered for 15 minutes. Cool, strain and add vinegar.

1 cup black beans
2 cups of water
Soak beans in water overnight. Strain and use.
Note: This dye is very simple to make since it doesn’t need cooking or vinegar, but it does need more time to soak overnight. Don’t forget to cook and eat the soaked beans!
Dye Process
Step 1: Gently wash eggs with dishsoap, rinse well and pat dry. This ensures that there are no oils or fingerprints on the eggs and will allow the dyes to adhere better to the shell.
Step 2: Carefully place eggs in dye baths and leave for about 30 minutes for light colours and up to 24 hours in the fridge for dark colours.
Step 3: Carefully remove eggs from dye and let dry completely, touching as little as possible. (Overturned empty egg cartons are ideal for this.) The natural dyes are quite fragile when wet, but will become more stable once they’re dry. It is also very normal for them to change colour as they oxidize and dry. Magic!
Step 4: Rub a drop of oil all over the eggs to make them shiny.

Things to Remember
Natural dyeing is less predictable than commercial food colouring, so the results can sometimes be surprising!
I’ve given recipes for the natural dyes I’ve had the most success with over the past few years, but there are certainly other things you can try: strong coffee, chamomile tea, red onion skins, blueberries, avocado skins, grape juice...
Dyeing is very forgiving, so experiment and have fun!
Layering and Mixing Colours
You can experiment with layering colours by leaving the eggs in one dye bath for about 15-30 minutes for a base coat, letting them dry, then placing in a second dye bath.
Layering more than one colour of dye will allow you to create a wider range of colours. For example, the best way I’ve found to create green is to layer turmeric (yellow) + red cabbage (blue).
You can also try multiple layers of the same dye for stronger colours. (Or leave them in the dye overnight.)

Laisser un commentaire
Voir l'article entier

Our new Gavotte BFL worsted yarn

Toccata Organic Cotton: Yarn Notes and Pattern Ideas
We're very excited to bring you the first-ever 100% cotton Sweet Paprika yarn!
Like many of you, we really enjoy working with plant fibres as well as wool yarns, especially in the hot summer months. So we spent some time this past winter researching and sampling cotton and hemp yarn bases, and in the end we decided to bring in a small batch of Toccata, a sport-weight organic cotton.

Three books about sheep and fibre
Are you looking to deepen your knowledge of fleeces and fibres? Below, we introduce three books we carry that contain a wealth of information about different fibre-producing animals and sheep breeds, and the best ways to use their fleeces. We hope this selection will support you as you explore different ways to work with a wide array of animal fibres.
Abonnez-vous
Sign up to get the latest on sales, upcoming events, new yarn, patterns and more...
+À propos du Sweet Paprika
Sweet Paprika Designs propose des matériaux de haute qualité pour les tricoteurs et crocheteurs, en mettant l’accent sur des produits locaux et durables. Les copropriétaires (et soeurs) Debbie et Elizabeth créent leurs propres laines teintes à la main, ensemble prêt-à-tricoter et patrons dans leur atelier de teinture à Montréal et organisent des événements de tricot et de teinture dans la communauté.
Elizabeth Sullivan
Auteur